A terminal-native team collaboration tool for your local network. Tasks, chat, GitHub activity — all in one TUI.
What is wert?
wert is a CLI tool that lets a small team share a live workspace over a LAN. One person runs the server (admin), everyone else joins as a member. You get a full-screen terminal UI with real-time task tracking, team chat, and optional GitHub integration — no cloud required.
Architecture
Key concepts
- Admin — can create, assign, and delete tasks. Runs the server.
- Member — can update status on their own tasks, chat with the team.
- MCP server — lets Claude manage tasks and send messages via the REST API.
- Cmdline — Vim-style floating command bar activated with Shift+;.
Download
Prebuilt binaries for macOS, Linux, and Windows. No dependencies, no runtime.
wert update once installed to always stay current.
macOS
# after downloading, make it executable and move to PATH
chmod +x wert-darwin-arm64
mv wert-darwin-arm64 /usr/local/bin/wert
Linux
chmod +x wert-linux-amd64
sudo mv wert-linux-amd64 /usr/local/bin/wert
Windows
Rename the downloaded file to wert.exe and move it to a folder in your PATH, e.g. C:\Windows\System32\ or any custom folder you have in %PATH%.
Verify checksum
sha256sum -c checksums.txt --ignore-missing
All releases
Browse all versions and changelogs on GitHub Releases →
Self-update
Once installed, wert can update itself in one command:
wert update
Or type :update in the cmdline inside the TUI. It fetches the latest binary, replaces the current one, and relaunches automatically.
Build from source
Requires Go 1.22+.
Build
git clone https://github.com/mugiwaraluffy56/wert
cd wert
go build -o wert .

# install to PATH
cp wert /usr/local/bin/wert
Cross-compile all platforms
make cross-build # linux + darwin + windows × amd64/arm64 → dist/
Flags overview
| command | flag | default | description |
|---|---|---|---|
wert serve | --name | required | your display name |
--port | 8080 | server listen port | |
--token | none | join password — anyone who knows it can connect as member | |
--data | wert-data.json | persistence file path | |
wert join | --host | required | server address, e.g. |
--name | required | your display name | |
--token | none | join password (required if server was started with --token) | |
wert mcp | --server | http://localhost:8080 | REST API base URL |
--agent-name | none | name to register in the agent registry |
wert serve
Start the server and open the admin TUI. Run this on the host machine.
Basic usage
wert serve --name alice
With admin token
If you set a token, only people who pass it with --token get the admin role. Without a token, the server trusts the first WebSocket connection as admin.
wert serve --name alice --token secret123 --port 9000
Data persistence
The server writes tasks and chat history to a JSON file after every mutation. Members and the server address are in-memory only.
wert serve --name alice --data /var/wert/data.json
wert join --host.
REST API
The server exposes a REST API at the same port, used by the MCP server and agents:
| method | path | description |
|---|---|---|
GET | /api/members | list connected members |
GET/POST | /api/tasks | list or create tasks |
PUT/DELETE | /api/tasks/:id | update status or delete task |
POST | /api/tasks/:id/claim | claim task {"agent":"name"} |
POST | /api/tasks/:id/unclaim | release task claim |
POST | /api/messages | send a chat message |
GET | /api/watch?filter=types | SSE stream of all broadcast events |
GET/POST/DELETE | /api/agents | agent capability registry |
POST | /api/direct | deliver private DM to one recipient |
POST | /api/results | post structured agent result to team chat |
GET | /health | health check |
wert join
Connect to an existing server as a team member.
Basic usage
wert join --host:8080 --name bob
If the server was started with --token, pass the same token:
wert join --host:8080 --name bob --token secret123
Join approval
First-time members wait for the admin to approve them:
- Member side — animated spinner shows "waiting for admin approval"
- Admin side — a Y/N popup appears. Press Y to approve, N to reject.
- Once approved, the member is remembered. Future reconnects skip the approval step.
- Rejected members see an "Access Denied" screen and must Ctrl+C to exit.
/accept <username> or /reject <username>.
Reconnection
If the connection drops, wert automatically retries up to 15 times (every 3 seconds). The status bar shows progress. TUI state is preserved during reconnection.
Roles
| role | what you can do |
|---|---|
| admin | create tasks, assign to others, delete tasks, approve/reject joins, all member actions |
| member | update status on your own assigned tasks, send chat messages |
MCP server
Let Claude manage your team's tasks, send messages, and coordinate with other agents.
Start the MCP server
wert mcp --server http://:8080 --agent-name claude
--agent-name registers this instance in the agent capability registry and stamps the agent's name on task updates. Omit it for anonymous access.
Claude Code config
Add wert to ~/.claude/settings.json:
{
"mcpServers": {
"wert": {
"command": "wert",
"args": ["mcp", "--server", "http://:8080" , "--agent-name", "claude"]
}
}
}
Ask Claude to run team_context first — it returns all members and tasks in one call.
Available tools
| tool | description |
|---|---|
team_context | start here — full markdown: members, task counts, per-person breakdown with IDs and claimed status |
get_task | single task by ID prefix — all fields including claimed_by |
search_tasks | case-insensitive keyword search across titles and descriptions |
list_tasks | all tasks, optionally filtered by assignee or status |
list_members | connected members and their online status |
create_task | create and assign a task with title, description, assignee, priority, due date |
update_task | change status (todo / in_progress / done / blocked); stamps agent name as updated_by |
delete_task | permanently delete a task — prefer update_task to done instead |
send_message | broadcast a chat message to the whole team |
get_dashboard | markdown table: members, tasks per person, claimed status |
claim_task | lock a task so other agents know you're working on it |
unclaim_task | release a task claim when done or handing off |
wait_for_change | block until a team event fires (SSE push); optional type filter and timeout |
send_direct_message | private message delivered only to a specific agent or member |
post_result | publish a structured result block (analysis, summaries, reviews) to team chat |
register_capabilities | announce what this agent can do (visible in Members screen) |
list_agents | discover registered agents and their capabilities |
wait_for_change for push-based event delivery instead of polling.
Agent communication
Two AI agents can coordinate through wert: claim tasks, exchange private messages, publish results, and react to events in real time.
How it works
Typical agent workflow
-
1
Discover other agents. Call
list_agentsto see who else is connected and what they can do. -
2
Claim a task. Call
claim_taskbefore starting work. Returns a conflict error if another agent already claimed it — prevents duplicate work. -
3
Do the work. Update the task to
in_progresswithupdate_task. -
4
Publish the result. Call
post_resultwith a title and markdown content. It appears as a bordered result block in the team chat — distinct from regular messages. -
5
Hand off privately. Use
send_direct_messageto send instructions only to a specific agent or human. The rest of the team doesn't see it. -
6
Mark done and release. Call
update_tasktodone, thenunclaim_task.
Reacting to events with wait_for_change
Instead of polling, agents can block until something happens:
# wait for any event (30s timeout by default)
wait_for_change

# wait only for task updates or agent results
wait_for_change  filter="task_update,agent_result"  timeout=60
Event types: task_create, task_update, task_delete, task_claim, task_unclaim, agent_result, direct_message, chat, member_join, member_leave, agent_online
SSE endpoint (direct HTTP)
Non-MCP clients can subscribe to the event stream directly:
GET /api/watch
GET /api/watch?filter=task_update,agent_result
The server sends text/event-stream. Each event is data: {"type":"...","payload":{...}}. A keepalive comment is sent every 20 seconds.
Capability registry
Agents announce what they can do on startup. The registry is visible in the Members screen under "AI Agents".
# register via MCP tool
register_capabilities  capabilities="code_review,testing,analysis"

# or directly via REST
POST /api/agents  {"name": "claude", "capabilities": ["code_review", "analysis"]}
Registrations are in-memory only — agents re-register on each startup. The --agent-name flag on wert mcp handles this automatically.
Multi-agent config example
Two Claude instances with different roles in ~/.claude/settings.json:
{
  "mcpServers": {
    "wert-reviewer": {
      "command": "wert",
      "args": ["mcp", "--server", "http://localhost:8080", "--agent-name", "reviewer"]
    },
    "wert-deployer": {
      "command": "wert",
      "args": ["mcp", "--server", "http://localhost:8080", "--agent-name", "deployer"]
    }
  }
}
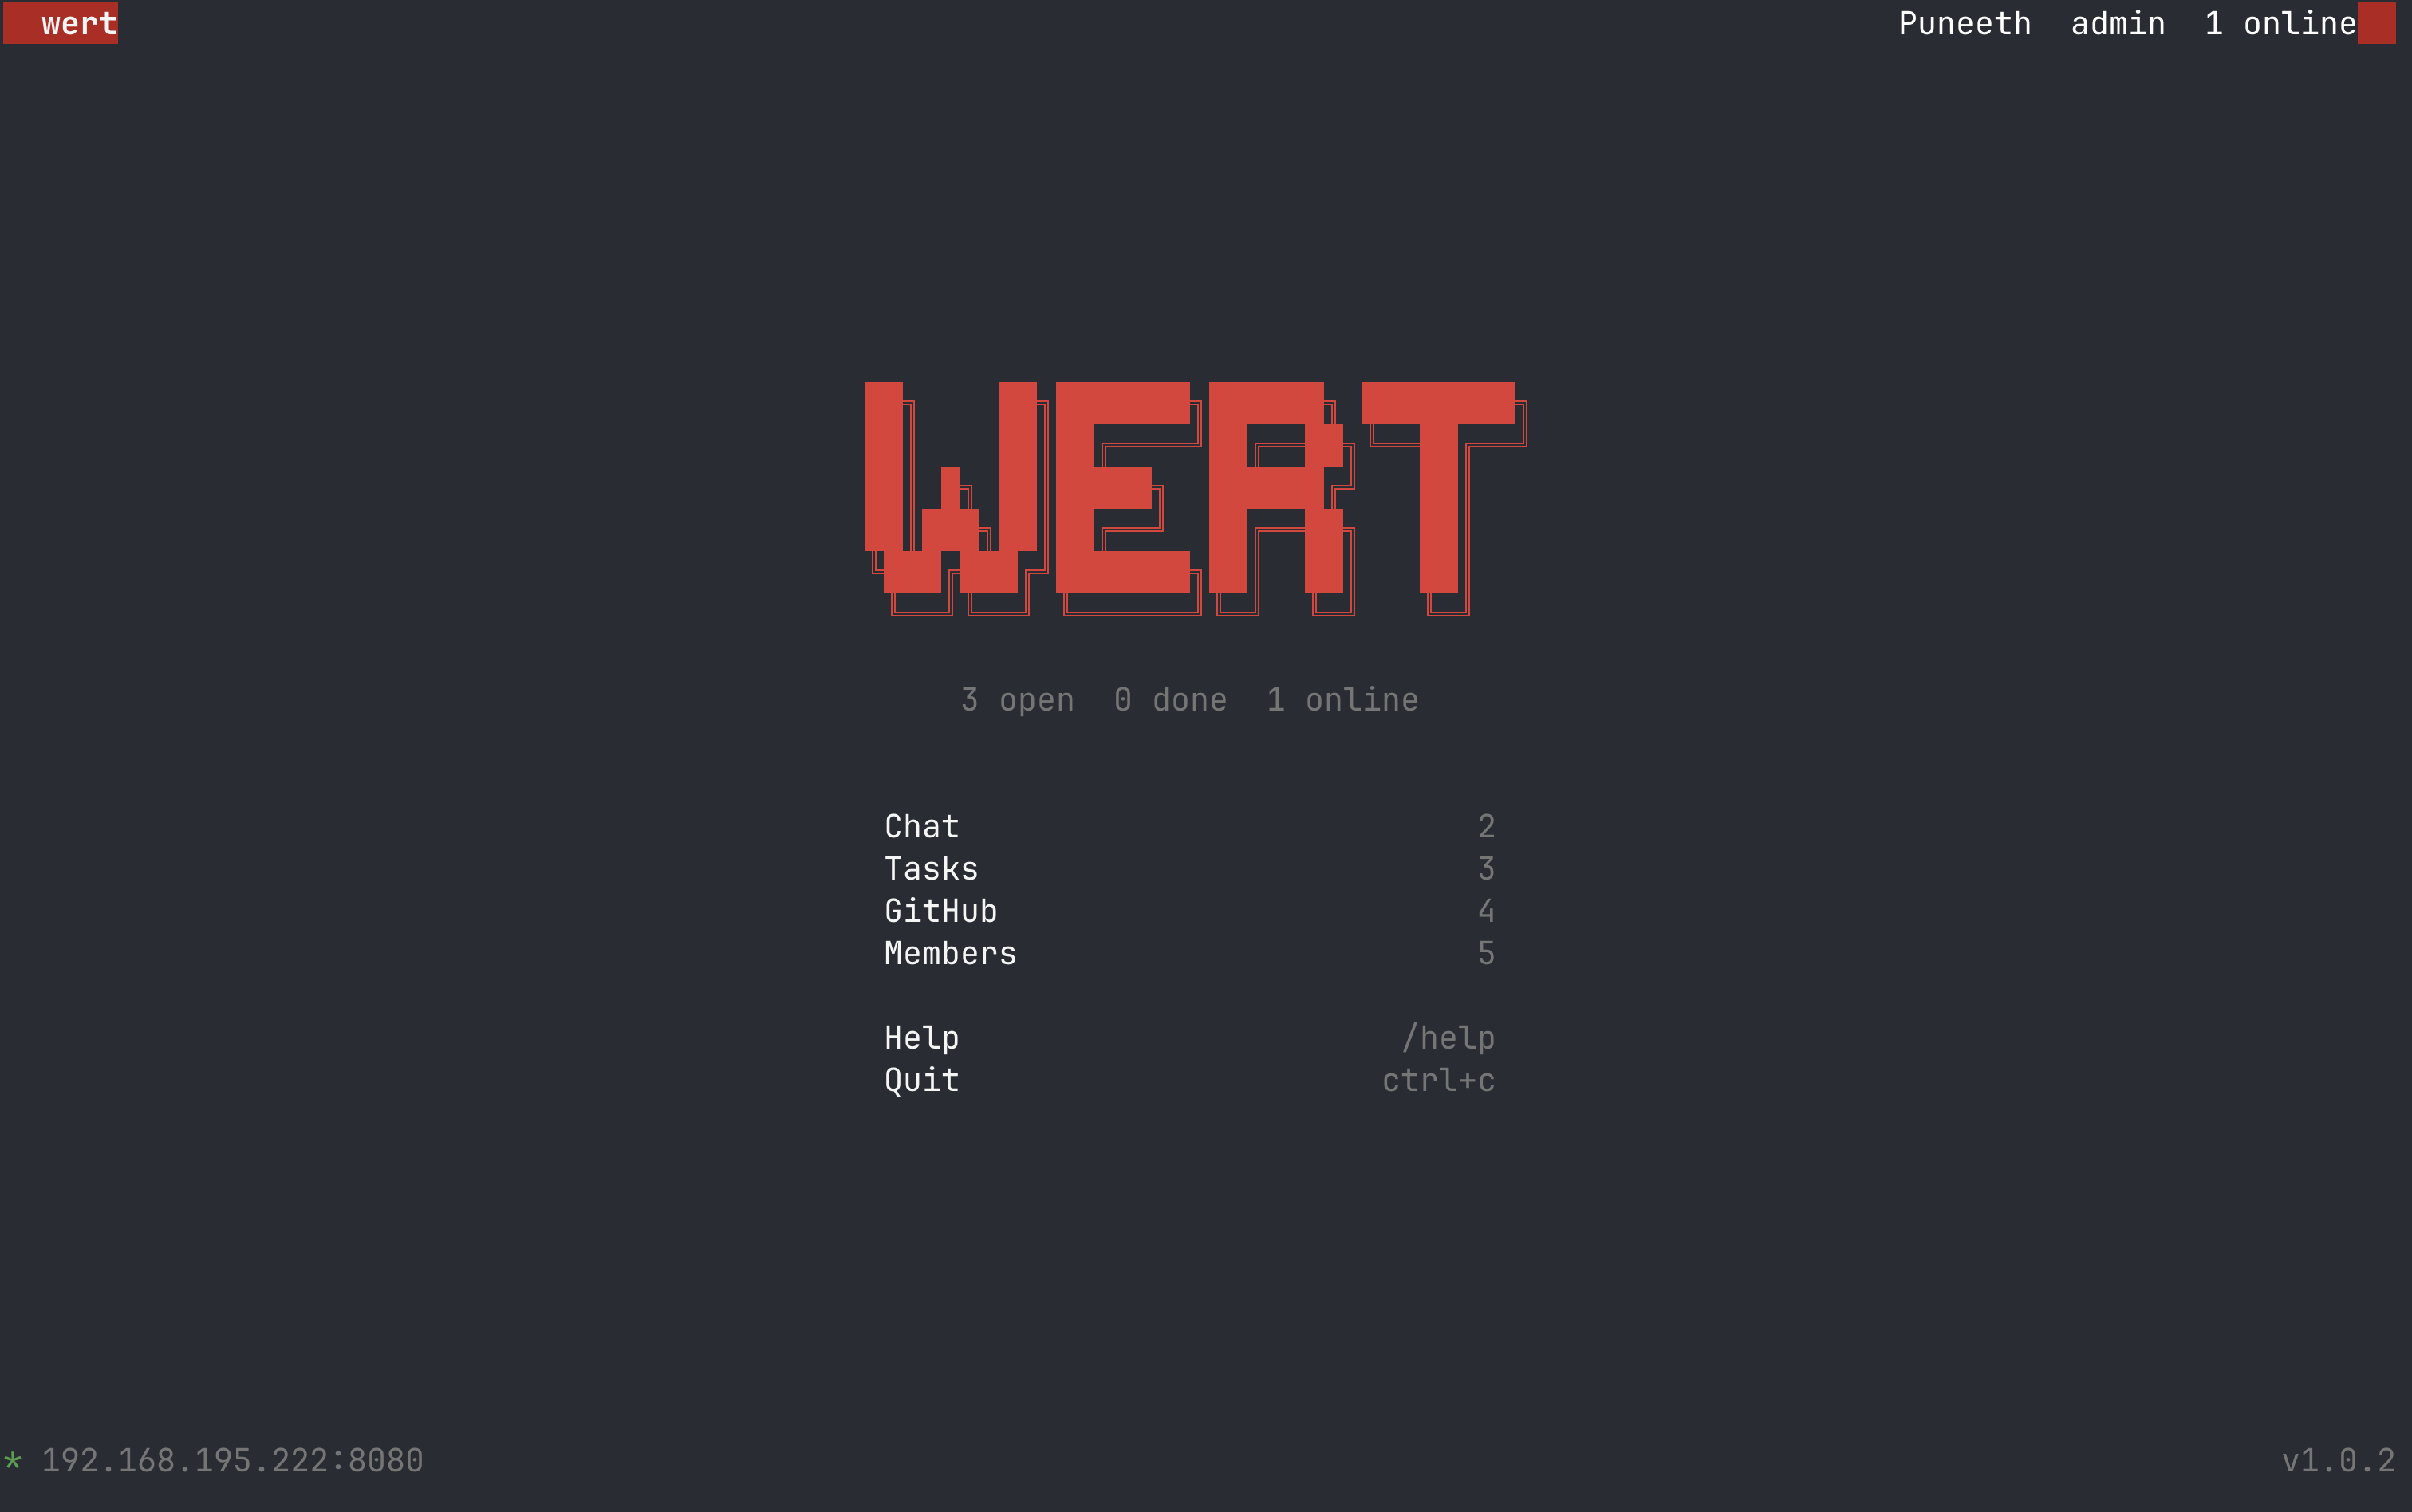
Home screen
Your landing screen with stats and quick navigation menu.
The Home screen shows the wert logo, a live summary (open tasks, done tasks, online members), and a navigation menu. It's purely informational — no input box.
Getting around from Home
Press 2–6 to jump directly to a screen, or open the cmdline with Shift+; and type a screen number.
Chat
Real-time team chat with @mentions and message history.
Sending messages
Type in the input box at the bottom and press Enter. Messages are broadcast to everyone connected. The last 100 messages are persisted on the server.
@mentions
Include @username in a message to mention someone. They'll see a notification badge in the status bar even if they're on a different screen.
Unread badge
When you're on any screen other than Chat and a new message arrives, an unread count badge appears in the header next to "2:Chat". It clears when you visit Chat.
Sending from Workstation
The Workstation screen has its own message input at the bottom. Messages sent there go to the same shared chat channel.
Tasks
Create, assign, track, and update tasks across the team.
Task statuses
| status | command | colour |
|---|---|---|
| todo | /todo <id> | red |
| in_progress | /wip <id> | green |
| done | /done <id> | dim green |
| blocked | /blocked <id> | dim red |
Sub-tabs and filters
Press number keys 1–5 while on the Tasks screen (when the input box is empty) to jump directly to a filter tab:
| key | filter |
|---|---|
| 1 | All tasks |
| 2 | Todo |
| 3 | In Progress |
| 4 | Done |
| 5 | Blocked |
You can also use [ and ] to cycle through filters left and right.
Creating tasks (admin)
# basic
/assign @bob "Fix login bug"

# with description and priority
/assign @alice "Deploy to staging" "Run deploy.sh on prod box" high

# with due date
/assign @bob "Write release notes" "" medium due:2025-01-31
Updating tasks
Use the short 8-character ID prefix shown in the task list:
/wip a1b2c3d4
/done a1b2c3d4
/blocked a1b2c3d4
Deleting tasks (admin)
/delete a1b2c3d4
Notification
When a new task is assigned to you, a notification appears in the status bar regardless of which screen you're on.
GitHub
View your org's repos, open PRs, and open issues — live from the GitHub API.
Quick setup
You need a Classic PAT with two scopes. See the GitHub setup guide → for a full step-by-step walkthrough.
/github setup --token ghp_xxxxxxxxxxxx --org your-org-or-username
Refresh
/github refresh
Sub-tabs
Press number keys 1–4 while on the GitHub screen (when the input box is empty) to jump to a tab:
| key | tab | shows |
|---|---|---|
| 1 | Overview | stat boxes, recently pushed repos, recent PRs, org members |
| 2 | Repos | full repo table — name, description, stars, open issues, last push |
| 3 | Pull Requests | open PRs grouped by repo, with author and age |
| 4 | Issues | open issues grouped by repo, with labels, author, age |
You can also use [ / ] to cycle through tabs.
Personal accounts
wert automatically falls back from the org: search qualifier to user:, and then to a per-repo search if needed. Personal accounts and orgs both work.
Workstation
A dedicated split-pane workspace with a message input. Screen 5.
Default layout
By default, Workstation shows Tasks on the left and Chat on the right, with a message input at the bottom. Navigate here with 5 or :5.
Split pane commands
Open the cmdline (Shift+;) and use sp to set a custom layout:
| command | result |
|---|---|
sp h3 | full pane showing Tasks |
sp v2 | current screen top, Chat bottom |
sp h3 h2 | Tasks left, Chat right |
sp v3 h2 | Tasks top, then Chat left + GitHub right in bottom half |
cl | reset to default Tasks / Chat layout |
Screen numbers for panes
| number | content |
|---|---|
1 | Home |
2 | Chat |
3 | Tasks |
4 | GitHub |
6 | Members |
Message input
The input box at the bottom of Workstation sends messages to the shared chat channel — same as the Chat screen's input.
Members
See who's on the team, their role, task counts, and registered AI agents. Screen 6.
Navigate here with 6 or :6. Each row shows:
- Online indicator — green
*when connected, greyowhen offline - Username and role — admin shown in red
- Task counts — open and done tasks assigned to that member
AI agents section
Below the human members, a separator shows registered AI agents with their capabilities. Agents appear when they connect via wert mcp --agent-name and disappear when they disconnect.
In Workstation panes
You can show the Members view as a pane inside Workstation using screen number 6:
:sp h6    # members pane, full width
:sp h3 h6 # tasks left, members right
Cmdline
A Vim-style floating command bar accessible from every screen.
Activating
Press Shift+; (i.e. :) from any screen. The cmdline appears as a centered floating box overlaid on the current content. Press Shift+; again or Esc to dismiss it.
Navigation commands
| command | action |
|---|---|
1 – 6 | switch to that screen |
q / q! / quit | quit wert |
docs | open the wert documentation in your browser |
Workstation commands
| command | action |
|---|---|
sp <dir><n> [<dir><n>] | open Workstation with a split layout |
cl / close | reset Workstation to default layout |
Split command syntax
v = vertical split (top / bottom), h = horizontal split (left / right), number = screen.
sp v3 h2   # tasks top, chat left + github right (bottom)
sp h3      # tasks only, full pane
sp h6 h3   # members left, tasks right
Split panes
Arrange multiple screen views side-by-side inside the Workstation.
How it works
The sp command builds a binary pane tree. Each argument adds a split:
- First arg — splits the full area. Direction + screen number for the new pane.
- Second arg — further splits the second leaf of the first split.
Examples
sp h3 — Tasks, full width
sp v2 — current top, Chat bottom
sp h3 h2 — Tasks left, Chat right
sp v3 h2 — Tasks top, Chat/GitHub bottom
Reset
Type :cl in the cmdline to go back to the default Tasks + Chat layout.
Command reference
All slash commands and cmdline commands in one place.
Slash commands (input box)
| command | role | description |
|---|---|---|
/help | all | show command reference in chat |
/done <id> | all | mark task as done |
/wip <id> | all | mark task as in progress |
/blocked <id> | all | mark task as blocked |
/todo <id> | all | reset task to todo |
/members | all | show member list in chat |
/assign @user "title" ["desc"] [priority] [due:YYYY-MM-DD] | admin | create and assign a task |
/delete <id> | admin | delete a task |
/github setup --token <t> --org <o> | all | configure GitHub integration |
/github refresh | all | refresh GitHub data |
/exit / /quit | all | quit wert |
Cmdline commands (Shift+;)
| command | description |
|---|---|
1 – 6 | navigate to screen |
q / q! / quit | quit |
update | download latest release and relaunch |
docs | open documentation in browser |
sp <v|h><n> [<v|h><n>] | open Workstation with split layout |
cl / close | reset Workstation to default layout |
Task priorities
| value | display |
|---|---|
high | ^ high |
medium (default) | - med |
low | v low |
GitHub setup guide
Step-by-step: create a Classic PAT with the right scopes so wert can read your org's repos, PRs, and issues.
Step-by-step
-
1
Open GitHub in your browser. Make sure you're signed in to the account that is a member of your org.
-
2
Go to token settings.
Click your profile photo (top-right) → Settings → scroll all the way to the bottom of the left sidebar → Developer settings → Personal access tokens → Tokens (classic). -
3
Generate a new classic token.
Click Generate new token → Generate new token (classic).
GitHub may ask you to confirm your password. -
4
Fill in the token details.
- Note: anything descriptive, e.g.
wert-local - Expiration: set to 90 days or No expiration (your call)
- Note: anything descriptive, e.g.
-
5
Select exactly these two scopes:repo REQUIRED
Full control of private repositories. This lets wert list your repos and read PR/issue data from private repos. Check the top-level repo checkbox — it automatically selects all sub-scopes (
repo:status,repo:deployment,public_repo,repo:invite,security_events).read:org REQUIREDRead org and team membership. This is what enables the GitHub Search API to accept
org:yourorgas a search qualifier. Without this, you get a 422 Validation Failed error even if you own the org. It's under the admin:org section — expand it and check only read:org.You do not needadmin:org,write:org, or any other scope. Justrepo+read:org. -
6
Click "Generate token" at the bottom of the page.
GitHub shows you the token exactly once. Copy it now — you cannot see it again.ghp_xxxxxxxxxxxxxxxxxxxxxxxxxxxxxxxxxxxx
-
7
If your org uses SAML SSO — authorize the token.
Next to your newly created token in the list, click Configure SSO → Authorize next to your org name. If you skip this, GitHub will reject all API calls for that org even with the right scopes.If you don't see a "Configure SSO" button, your org doesn't use SAML SSO — skip this step. -
8
Connect wert to GitHub.
In the wert TUI, go to screen 4 (GitHub) or use the input on any screen:/github setup --token ghp_xxxxxxxxxxxx --org your-org-name
The
--orgvalue is the org slug (the part aftergithub.com/), not the display name. For personal accounts, use your GitHub username. -
9
You're done. wert fetches your repos, open PRs, and open issues. Use
/github refreshany time to reload the data.wert automatically tries three search strategies:org:→user:→ per-repo. So even if one approach fails for your setup, it falls through to the next.
Troubleshooting
| error | cause | fix |
|---|---|---|
422 Validation Failed |
Token is missing read:org scope, or it's a Fine-grained PAT |
Create a new Classic token with both repo and read:org |
401 Unauthorized |
Token is invalid or expired | Generate a new token and run /github setup again |
403 Forbidden |
SAML SSO not authorized for this token | Go to token settings on GitHub → Configure SSO → Authorize your org |
404 on repos but not PRs |
Org name is wrong, or you used a user account name for an org | Double-check the slug in the GitHub URL (e.g. github.com/your-org) |
| No PRs or issues shown | Your repos are private and the token has no repo scope |
Re-create the token and check the repo checkbox |